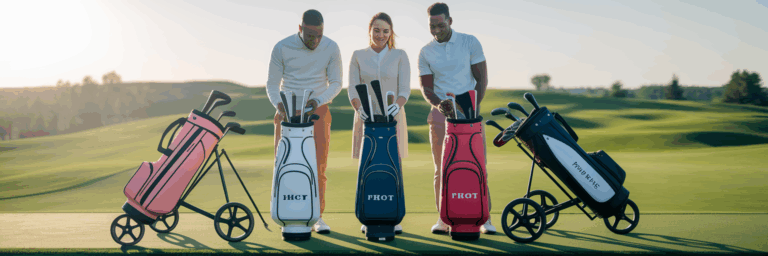
How to Break in New Golf Shoes for Maximum Comfort on the Course
Why a Proper Break-In Is Your First Step to a Better Game
It might surprise you to learn that according to research from golf shoe manufacturer FootJoy, a majority of golfers wear the wrong shoe size. This small detail can have a big impact on your game. Breaking in new golf shoes is about more than just avoiding discomfort; it is fundamental to your performance. A shoe that has molded to your foot provides a stable and secure base, which is essential for generating power and consistency in your swing.
Think of it as creating a custom piece of equipment. When you skip the break-in process, you risk painful blisters and foot fatigue. We have all been there, where new golf shoes hurt feet so much that it ruins an entire round. This initial effort transforms a generic shoe into a high-performance tool tailored just for you. Taking the time for this process is a foundational element of learning how to play golf with confidence and comfort from the ground up.
The Foundation of Comfort Starts with the Right Fit
Before you even think about how to break in golf shoes, you must ensure you have the right size. No break-in method can fix a shoe that is fundamentally too small, too large, or the wrong shape for your foot. Getting the fit right from the start is non-negotiable.
When you are at the store, use this simple checklist to confirm you have found the perfect pair. As highlighted in FootJoy's comprehensive fitting guide, these checks are industry best practices for a reason.
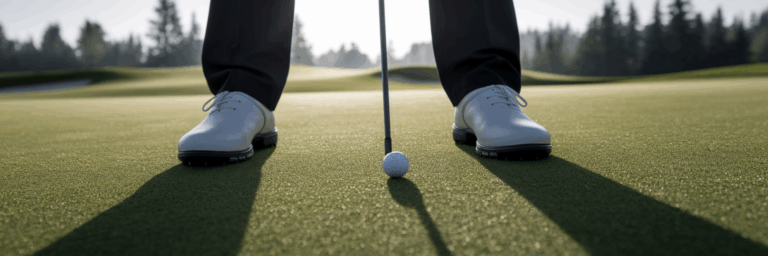
- Check the Length: You should have about a thumb’s width of space between your longest toe and the end of the shoe. This prevents your toes from jamming into the front during the weight transfer in your swing.
- Assess the Width: The shoe should feel snug across the ball of your foot but not tight. You should not feel any pinching or squeezing. Your foot needs room to expand slightly as you walk the course.
- Find the Flex Point: Bend the shoe. It should flex naturally where your forefoot bends. If the flex point is off, it can cause arch strain and discomfort over 18 holes.
Here is a practical tip: always try on shoes at the end of the day when your feet are slightly swollen. Make sure to wear the same type of golf socks you plan to use on the course to get the most accurate fit possible.
Your Step-by-Step Home Break-In Plan

Once you have the right pair, the break-in process can begin. The most reliable method is a gradual, low-impact schedule at home. This gentle approach allows the shoe materials to adapt to your foot without causing any stress or discomfort. Start by wearing your new shoes on a soft surface like a carpet to avoid scuffing the soles.
Follow this simple timeline to ease your shoes into service:
- Day 1-2: Wear the shoes for 20 to 30 minute intervals. Walk around the house, stand in them while you work, or even mimic your golf stance. This introduces your foot’s unique shape to the shoe.
- Day 3-4: Increase the wear time to 45 to 60 minutes. As you walk, pay close attention to any areas that feel a little too snug. These are the spots that will need the most attention.
- Day 5 and beyond: Continue increasing the wear time by 30 minutes each day. Your goal is to comfortably wear them for at least two hours straight before you even consider taking them to the driving range.
This method works because the gentle heat from your feet and the light pressure from walking slowly soften the materials, especially leather. This allows the shoe to mold perfectly to your foot’s contours, creating that custom-fit feel you need for a long day on the course.
Techniques to Accelerate the Softening Process
If you are short on time before your next round, there are ways to speed up the break-in period. This method is more active and is the best way to soften golf shoes quickly, but it requires a bit of care. It is an excellent technique for making minor adjustments, especially when it comes to stretching leather golf shoes.
Follow these steps carefully:
- Put on one or two pairs of your thickest, moisture-wicking golf socks.
- Lace up your new golf shoes snugly over the thick socks. They will feel tight, which is the point.
- Walk around your home for 10 to 15 minutes. The extra bulk from the socks will gently stretch the shoe’s upper material.
- While wearing the shoes, use a hairdryer on a warm, not hot, setting. Aim it at the tightest spots from about six to eight inches away, keeping the dryer moving constantly for two to three minutes to avoid damaging the material.
- Continue wearing the shoes as they cool down completely. This is a crucial step, as it allows the material to set in its newly expanded shape.
A word of caution: this technique is for making a good fit even better, not for fixing a shoe that is the wrong size. Always be gentle with the heat to protect your investment.
Managing Tight Spots and Preventing Hotspots

During the break-in period, you might notice specific areas of friction, often called "hotspots." These are warning signs on your heel, ankle, or toes that a blister is on its way. The key is proactive prevention, not reactive treatment.
For preventing blisters from golf shoes, the most effective strategy is to apply moleskin or a silicone blister pad directly to your skin before you feel any pain. If you know your heels are prone to rubbing, apply a pad before you even put the shoe on. This creates a protective barrier that absorbs the friction.
If a shoe feels tight in one specific spot, like across the top of your foot, you have a couple of options. A shoe stretcher can apply targeted pressure to that area overnight. You can also manually work the shoe with your hands, flexing and bending the stiff material, especially after it has been warmed slightly from wearing it.
Do not underestimate the power of lacing techniques. If you feel pressure on the top of your foot, try skipping an eyelet near the pressure point. This simple adjustment creates more room and can provide instant relief, allowing you to focus on your game instead of your feet.
Long-Term Care for Lasting Comfort and Performance
The effort you put into breaking in your shoes is an investment in your comfort and performance. Protecting that investment with proper long-term care ensures your shoes remain supportive for many rounds to come. Using cedar shoe trees is one of the best things you can do. They absorb moisture, prevent odors, and help the shoe maintain the custom shape you worked to create.
Always avoid storing your shoes in hot places, like the trunk of your car, as extreme heat can degrade the adhesives and materials. If possible, rotate between two pairs of golf shoes. This allows each pair to dry out completely between rounds, which significantly extends their lifespan. For more detailed instructions on cleaning and maintenance, FootJoy offers a helpful guide on their website.
| Factor | Full-Grain Leather Shoes | Synthetic Shoes |
|---|---|---|
| Break-In Time | Longer, more gradual | Shorter, often comfortable out of the box |
| Fit & Molding | Molds precisely to the foot over time | Less molding, more consistent fit |
| Breathability | Naturally breathable | Varies; often relies on vents or membranes |
| Maintenance | Requires cleaning and conditioning | Easier to wipe clean |
Note: This table summarizes general characteristics. Material technology is always advancing, but these trade-offs are a good starting point for your next purchase.
Ultimately, comfortable feet lead to a more enjoyable game. When you are not distracted by pain, you can focus on what truly matters: improving your skills and having fun. We are here to support you every step of the way as you learn how to play golf.